 Here is how I converted a cooler (ice chest) into a mash tun (MLT?). For those of you new to home brewing, a mash tun is used for converting starches in the grain to sugar which later is turned into alcohol by the yeast. You mix the crushed grain (mostly barley) with warm water, hold it at a specific temperature for a while (that’s where the insulated cooler comes in) then drain the liquid (wort) out leaving the grain behind. Then you proceed to boiling the wort while adding hops and other additions (the rest of the brewing process).
.
.
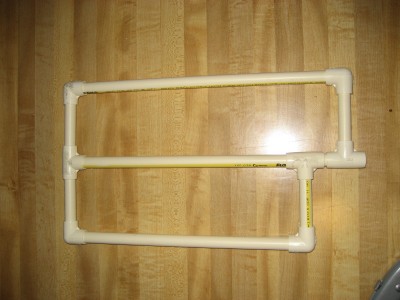
This is a very basic and cheep setup. I wanted to build a mash tun while spending as little money as possible. One way I saved money is by using an ice chest I already had. Since I didn’t want to commit my ice chest to this project I wanted to add a manifold and valve without any modifications to it and so I could easily disassemble it for cleaning. Another way I saved money is by using PVC instead of copper since it’s so expensive now.
Most of the parts came from the hardware store. I think the only thing I bought from my local home brew shop (LHBS) was the plastic valve.
Parts List:
- some PVC pipe
- 3 PVC T’s
- 4 PVC Elbows
- Some vinyl hose (not shown)
- Brass barb fitting (not shown)
- Plastic (vinyl?) valve
I’m not listing sizes or measurements since everything will very depending on your requirements (and because I don’t remember)
Tools Used:
- Hack saw
- Utility knife
- Tape measure
I cut up the pipe as shown above and dry fit everything to make sure it fits. Then I cut slits half way through the PVC spaced about an inch apart (half inch spacing would probably be better). The utility knife is to clean up the shavings from cutting the PVC. You will need to figure out a way to clean out the shavings inside from cutting the slits. Then screwed in the brass barb and attached the hose.
Update: Here is a close up of the slits I cut in the PVC.
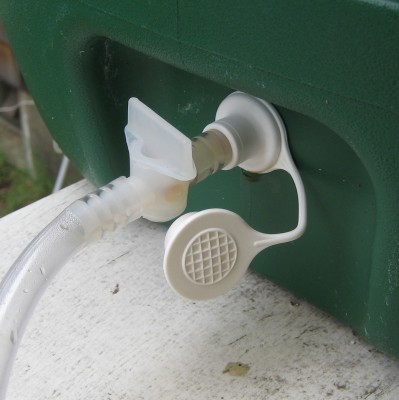
The hose just barely fit through the spout in the cooler and when you stuck the barb of the valve in it, it would make a tight seal in the cooler spout. This worked so well and the PVC fit tight enough that I did the whole project without using any kind of glue or sealer. This also allowed me to easily take it apart and clean it.
Valve
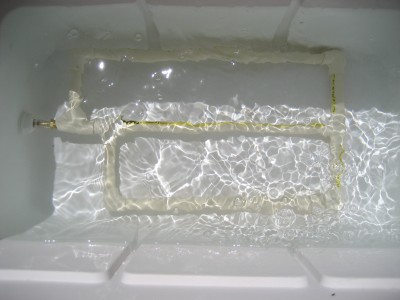
Mash Tun Test Run
First batch of grain before adding water.
I’ve used this for a few batches now and it works very well. If I did it again I would make it a little longer to reach the end of the cooler and not so wide so it wasn’t so close to the edges, but overall, it does its job.


The pipes and fittings shown are made from CPVC, not PVC. PVC is not rated for warm temperatures and can leach chemicals into your mash. CPVC is formulated to be used for hot and cold supply lines so it is made for higher temperaturs. Just wanted to clear that up for anyone making one of these.